Build Server, Part 2
Build your first application with Bruce
 Build Server, Part 2
Introduction
Bruce is a lightweight build server designed for efficient iteration and seamless integration with your workflows. In this tutorial, we'll continue building a flexible build server for your applications!
Requirements & Getting Started
To follow this guide, you need to have completed Part 1 or have a similar build server setup. Also be sure to set up an S3 bucket and export your AWS credentials if you choose to use the S3 destination. No need to install the full S3 CLI; Bruce.Tools handles the upload process. For reference, visit the Build Server, Part 1 guide.
Let’s Get to Building
First, ensure you have a repository of the application you intend to build. For demonstration purposes, we’ll clone and build the Bruce application itself.
We’ll create a manifest file to clone the project, compile it, and upload the artifact to an S3 bucket. Then, we’ll configure the action in Bruce.Tools to trigger on commits and use the successful action to deploy the artifact to the target system. The build artifacts will be stored in /data/bruce/builds.
        ---
variables:
  BUILD_DIR: /data/bruce/builds/bruce
steps:
- cmd: mkdir -p $BUILD_DIR
- gitRepo: https://github.com/brucehq/bruce.git
  dest: ${BUILD_DIR}
- cmd: docker run --rm -v $BUILD_DIR:/app -w /app golang:latest /bin/bash -c "GOOS=linux GOARCH=amd64 go build -o /app/artifacts/bruce -ldflags='-w -s' cmd/main.go"
  dir: ${BUILD_DIR}
- copy: $BUILD_DIR/artifacts/bruce s3://nitecon-builds/bruce
Save the manifest file as /data/bruce/build-bruce.yml.
Once saved, restart Bruce to make the new action available on the server:
sudo service bruce restart
Let’s Review
The manifest file creates a new directory at /data/bruce/builds/bruce for cloning the repository and compiling the Bruce binary. Docker is used with the latest Golang image to compile the binary, which is then stored in the /data/bruce/builds/bruce/artifacts directory. Finally, the binary is uploaded to an S3 bucket.
Make It Actionable
To make this manifest actionable, we need to update the server configuration file created in Part 1 (/data/bruce/server-config.yml) to include the new action. This will enable Bruce to recognize and execute the new manifest.
        ---
endpoint: wss://bruce.tools/workers
runner-id: 260444e5-18ef-4b05-8684-01362beef09c
authorization: c5ab4884-66ec-5610-8226-985bae9c230e
execution:
- name: node action
  action: default
  type: event
  target: /data/bruce/node.yml
- name: build bruce
  action: build-bruce
  type: event
  target: /data/bruce/build-bruce.yml
Here, we’ve added a new action named "build bruce" with the action identifier build-bruce. Remember to note this identifier for use in the Bruce.Tools workspace.
Triggering the Build
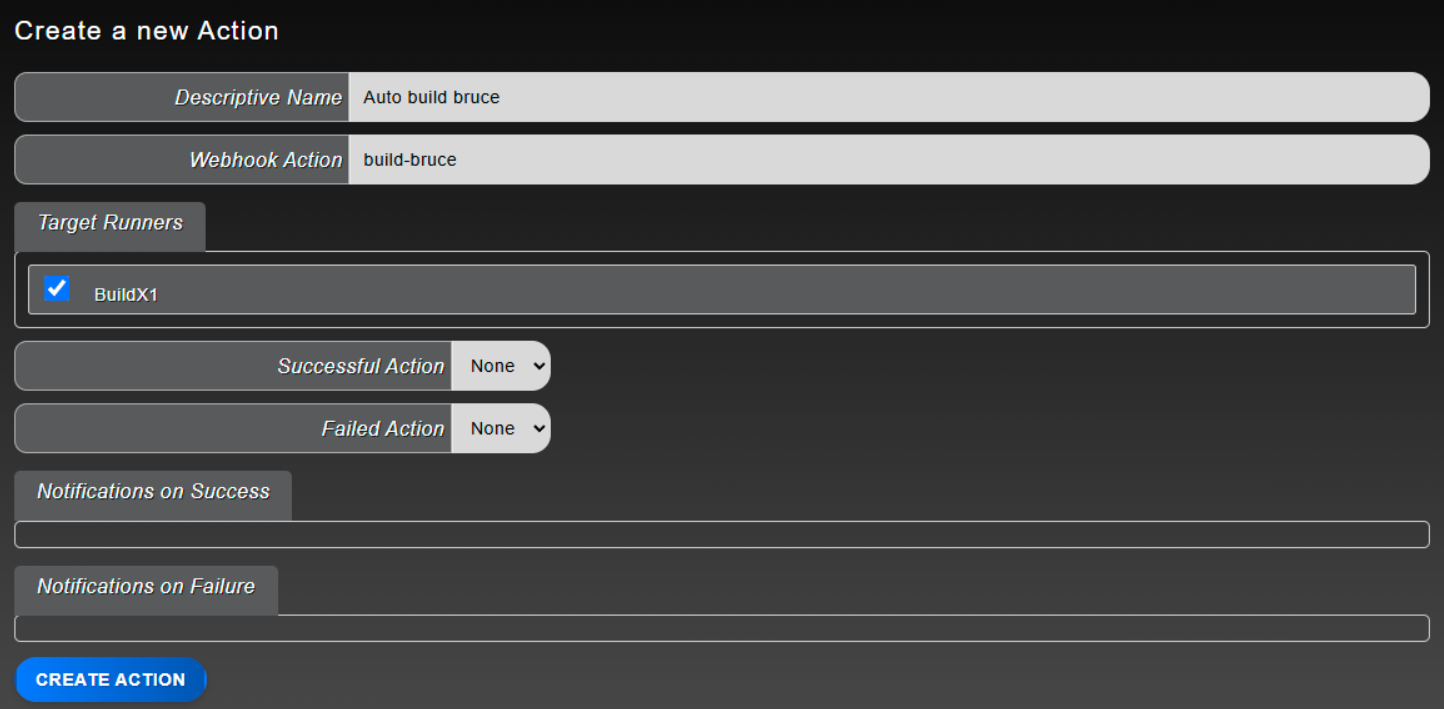
To trigger the build, create a new action in the Bruce.Tools workspace. Map this action to the build-bruce identifier and save it. You can then trigger it by clicking the play button in the workspace, which starts the build process. Logs will be available in the Bruce.Tools workspace.

Use the reference image above to create a new action. Map it to the action identifier and choose the target runners. After creating the action, click the play button to trigger it.
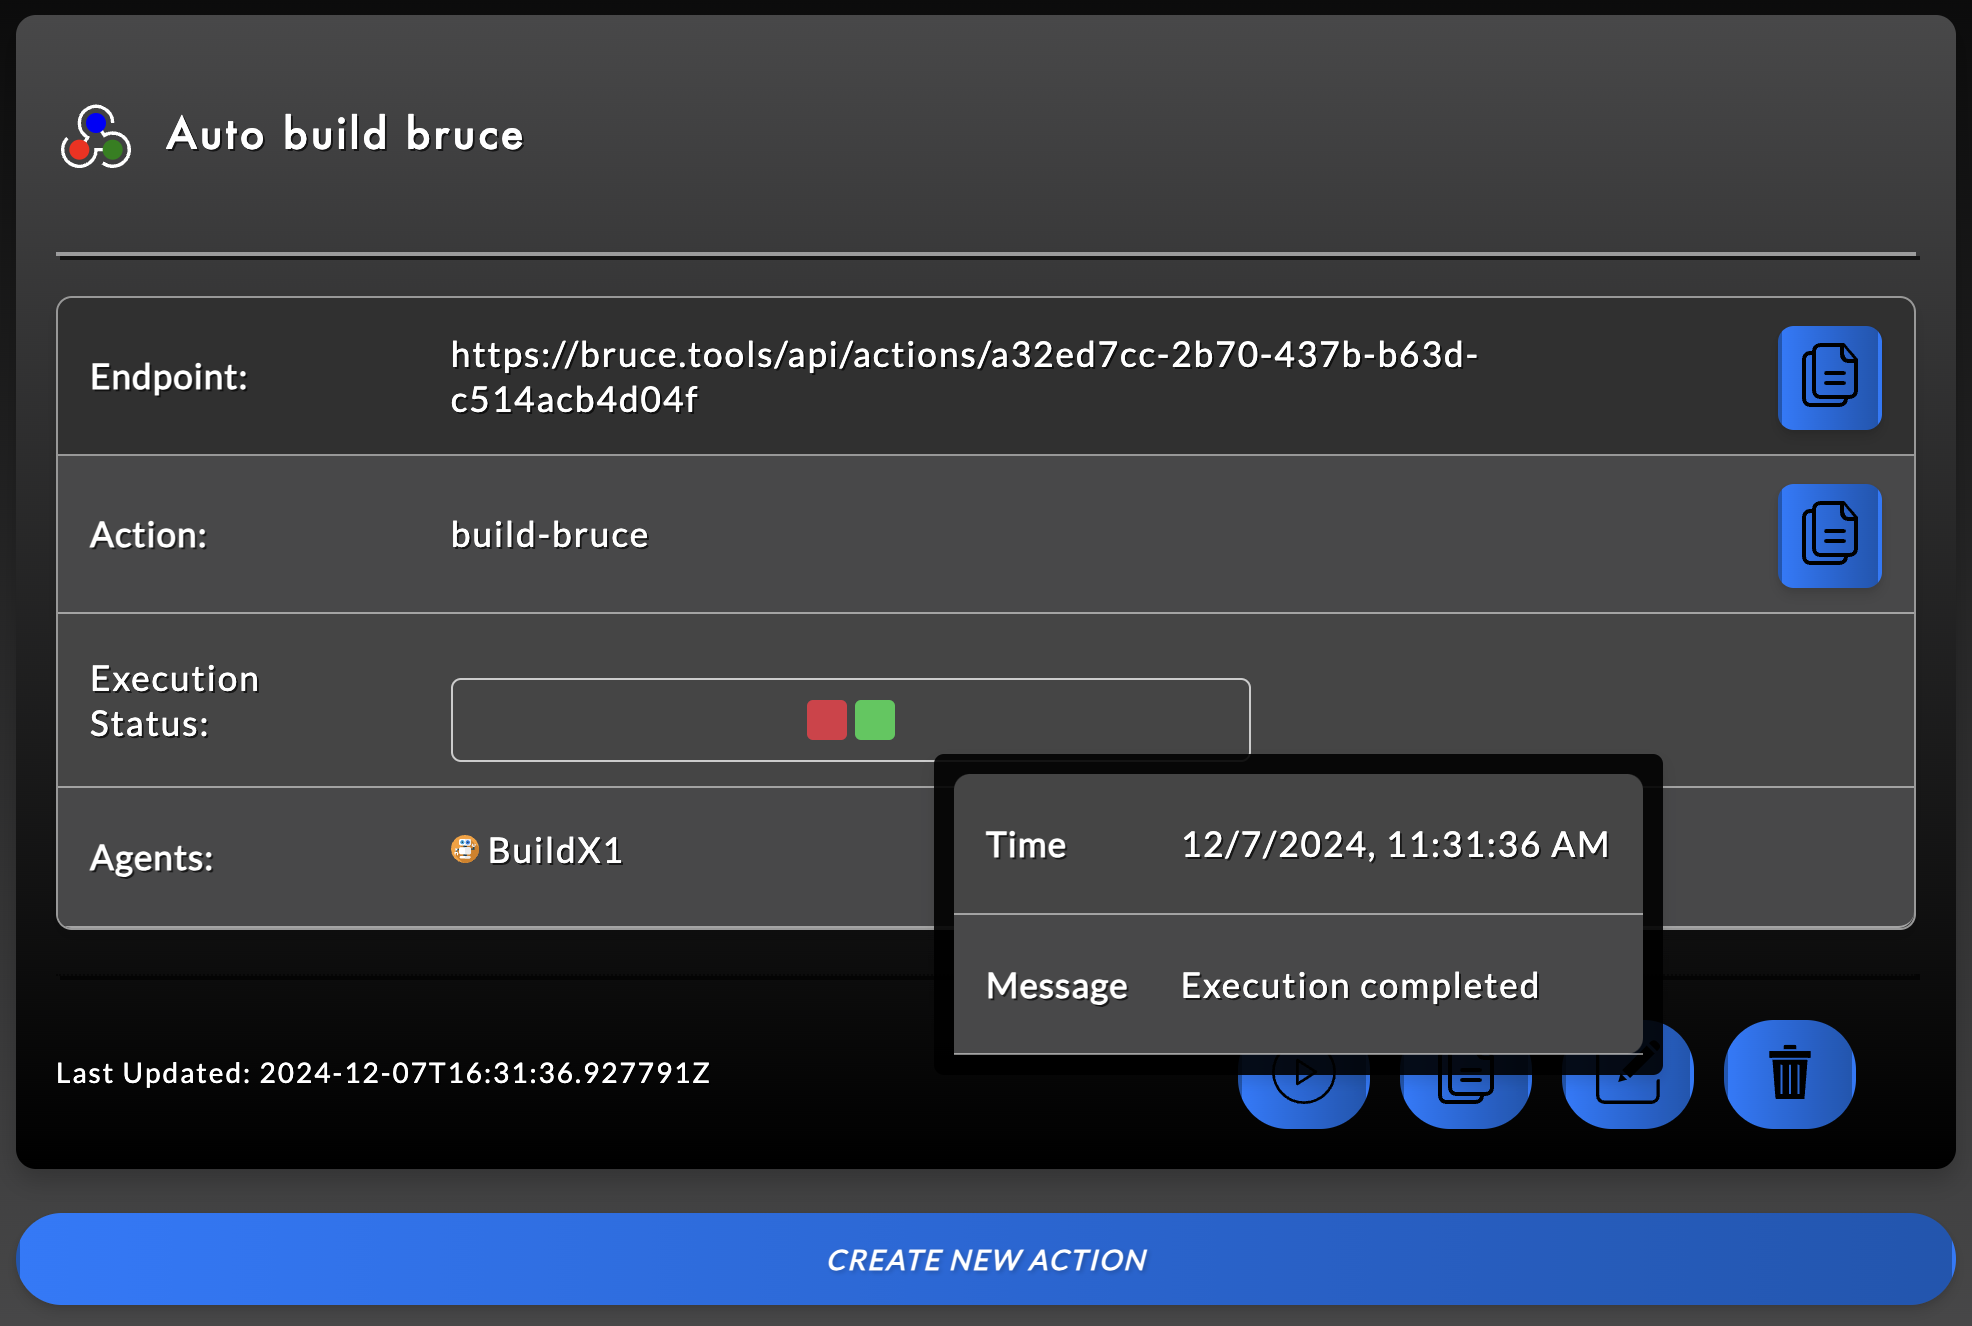
Once completed, you can view the action’s status in the agent view. For example:

The image above shows a successful action with the binary artifact uploaded to the S3 bucket. This process doesn’t require the S3 CLI; only the AWS_ACCESS_KEY_ID and AWS_SECRET_ACCESS_KEY environment variables are needed. For security, Bruce focuses on minimal log collection to prevent potential PII exposure.
Automate future runs
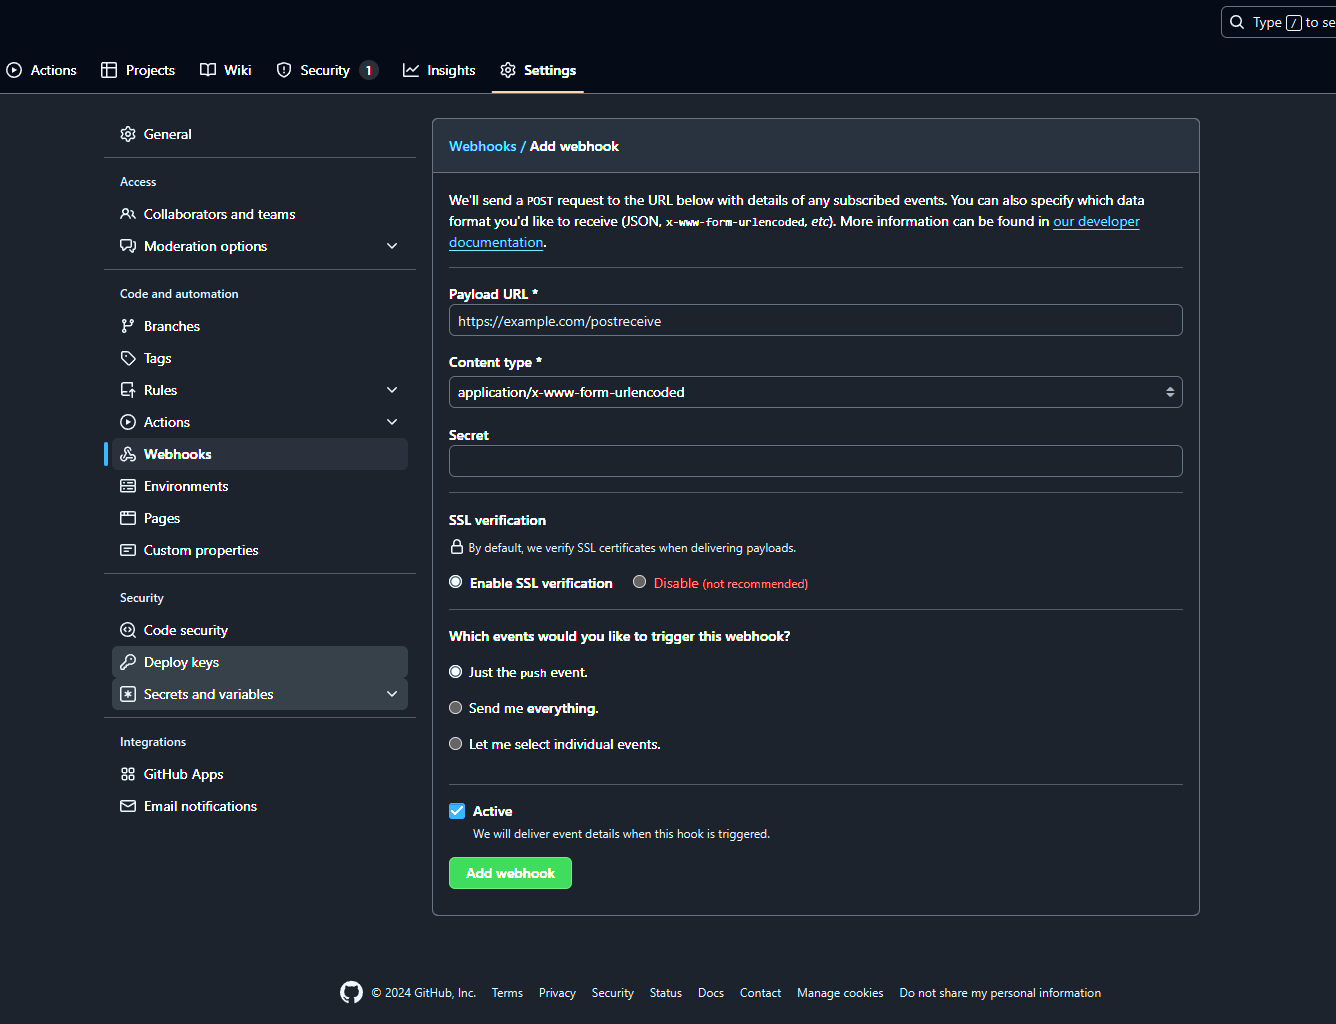
The final part involves using the webhook which is associated with your action by automatically executing the build once a commit etc completes. This is very simple in that all you have to do is go to github and create a new webhook, to do this go to the settings panel for your repository as seen below

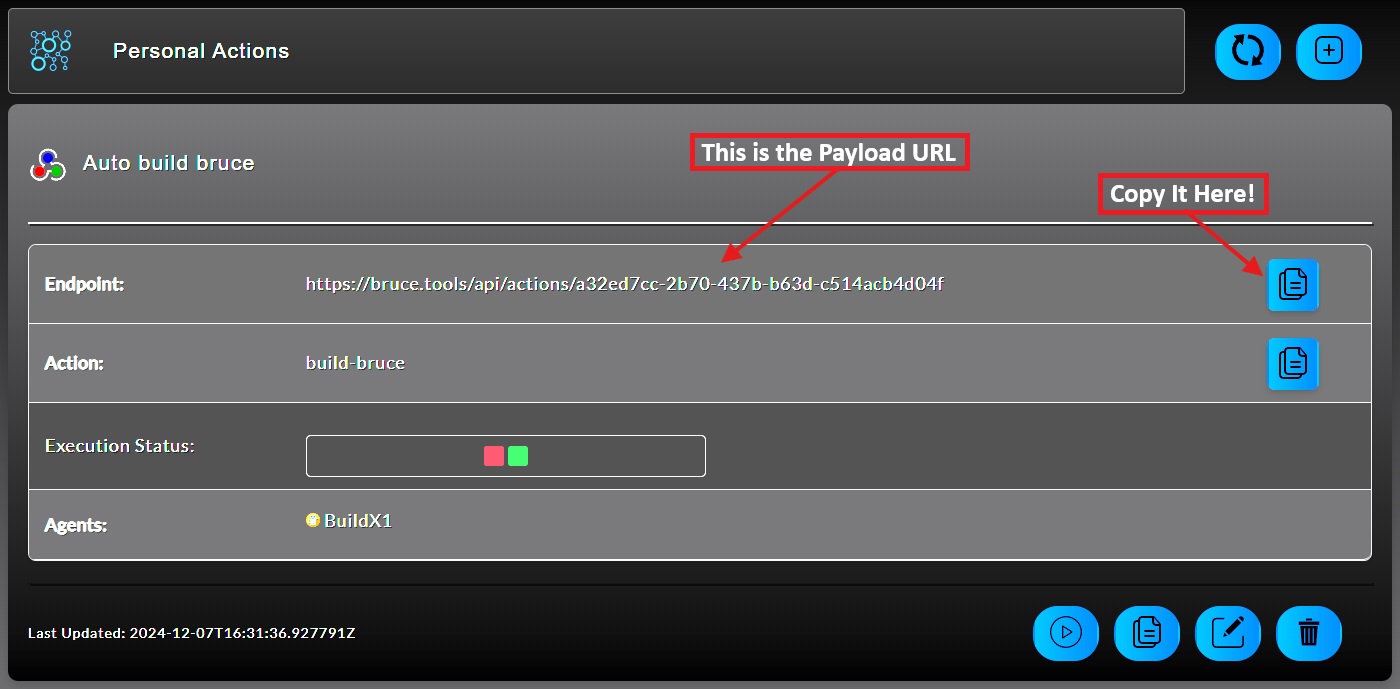
To find the appropriate Payload URL, go back to the action information on your dashboard, see below for reference on where to find teh payload url. Please note that the same can be done for runners. You can manually execute the payload in the dashboard, by hitting the payload URL directly with cURL, or with API operator within bruce to make your singular actions trigger more actions. And finally by setting up an auto commit hook for github as we saw here.

Conclusion
You should now be able to build your first application with Bruce, with a fully automated build trigger. In future guides, we’ll explore additional capabilities, such as using SCP for direct remote system copies and other storage options. Feel free to reach out for feature requests or suggestions!